by Anna Toma, Rise SA Team
HOW TO SET UP BANK STREAM IN RISE SCHOOL MANAGEMENT.
Table of content
Overview of this user guide
I. How to set up Bank Stream in RSM
II. How to manually import bank transactions to the Bank Stream
Overview of this user guide
I. How to set up Bank Stream in RSM
II. How to manually import bank transactions to the Bank Stream
Overview of this user-guide
In this user-guide, you will learn in detail how to set up your Bank Stream in Rise School Management.
Bank Stream provides your School with a live reflection of your bank account.
You will learn how to integrate your School's bank account into RSM in two ways:
- Live bank set up with the bank account details
- Manually importing bank transactions to the Bank Stream
This user-guide will also inform you how to manually import all transactions if your school's bank account was unable to integrate into RSM.
RSM has an import tool you can use to import all your school's bank transactions, which should be done at least once a month to accurately reflect the school's bank account.
I. How to set up a bank stream in RSM
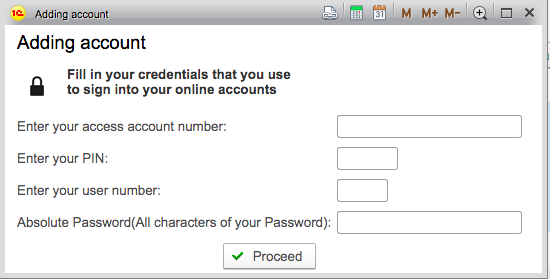
RSM has a bank integration tool. It automatically downloads and assigns your bank transactions. It currently works with 4 major banks in South Africa. The bank login details get encrypted & do not get stored in the system. The data is secure and only accessible through RSM, after you have logged in.
How to set up a Bank Stream in Rise School Management:
1. Log in to Rise School Management.
2. Click on Bank in the menu on the left hand-side.
3. Choose Bank Stream.
4. Choose the bank account that you want to sync or setup a new bank account.
2. Click on Bank in the menu on the left hand-side.
3. Choose Bank Stream.
4. Choose the bank account that you want to sync or setup a new bank account.
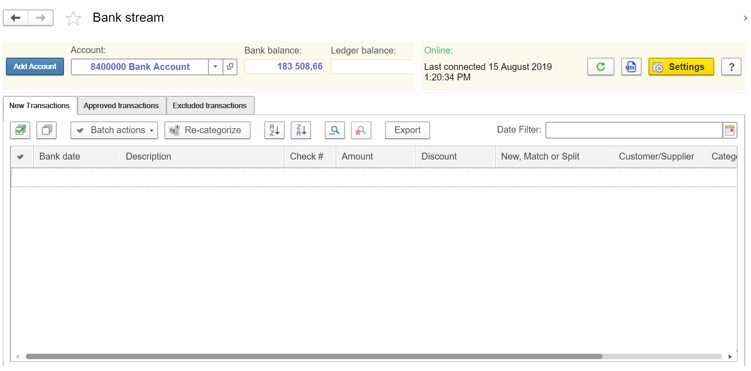
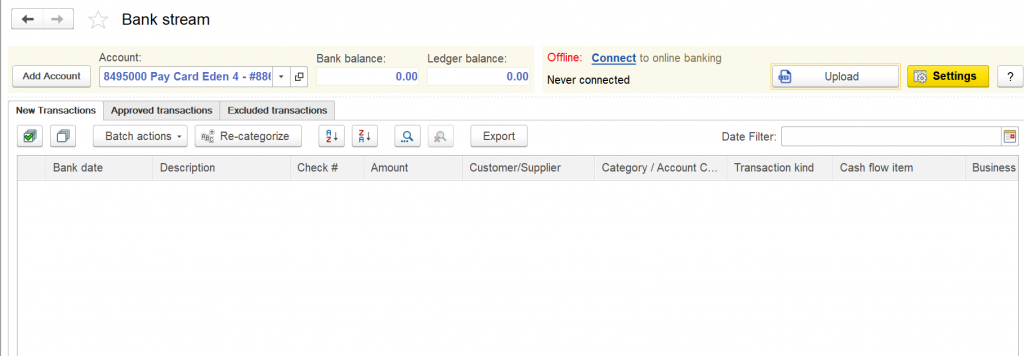
It will also show you the actual bank balance as it currently is on your bank, as well as the ledger balance on RSM.
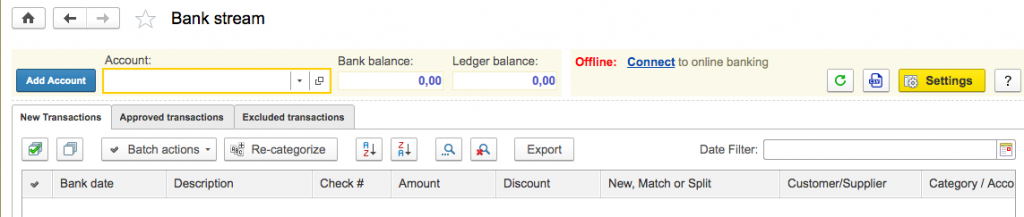
It will show you 3 tabs:
- New transactions - a list of all transactions that have not yet been allocated and posted
- Approved transactions - a list of transactions that have been assigned & approved
- Excluded transactions - a list of transactions that were excluded & need to be looked into
Bank Stream has:
- a match function where you can match a transaction to an invoice
- a split function where a single payment or receipt can be split for different customers or suppliers
- an account function if you want to allocate the account directly to the General Ledger
- an action function where you will approve the transaction
You only need to assign the transaction once and the next time a transaction with the same description is found, Bank Stream will automatically assign it for you.
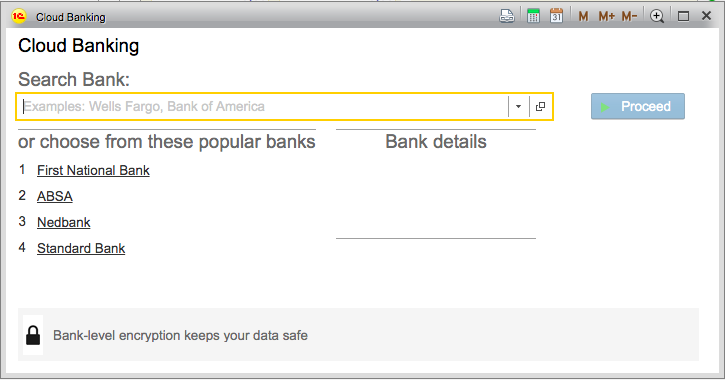
1. Click add account
2. Choose your bank
3. Click proceed
4. You will be presented with the accounts on your banking profile
5. Select the account that you want to download, where the initial download will download the transactions for the last 3 months.
2. Choose your bank
3. Click proceed
4. You will be presented with the accounts on your banking profile
5. Select the account that you want to download, where the initial download will download the transactions for the last 3 months.
II. How to manually import bank transactions to the Bank Stream
Another way to set up your bank stream without your bank account details is to manually import your bank transactions from a CSV file.
You can set up your Bank Stream manually by importing you transactions from a CSV / OFX file.
1. Go to Bank
2. Click on Bank Stream
3. Click on the Upload button on the right.
4. A window will pop up that will give you an option to choose your file.
5. Select the file with the transactions you wish to upload. Remember that the file should be in a CSV or OFX format.
2. Click on Bank Stream
3. Click on the Upload button on the right.
4. A window will pop up that will give you an option to choose your file.
5. Select the file with the transactions you wish to upload. Remember that the file should be in a CSV or OFX format.
IMPORTANT: Work with the transactions in a notepad on your desktop and make sure the information is separated by a comma ( , ) and do not forget to save it in a CSV or OFX format.
6. After selecting the file, click continue to carry on with the process.
7. Another window will pop up, giving you an option to either upload all the transactions or choose according to a specific date range.
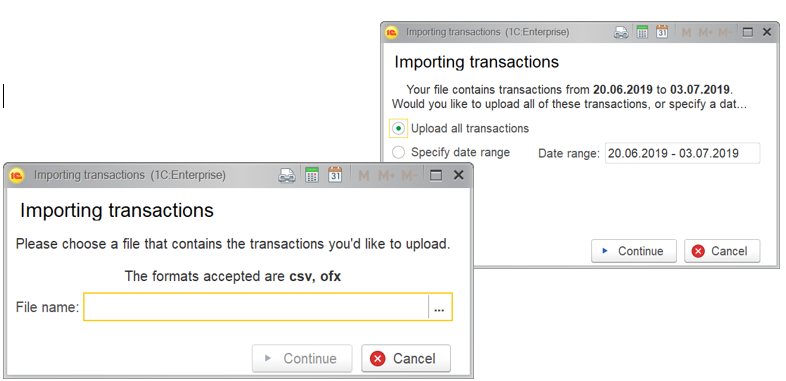
8. Click continue to complete.
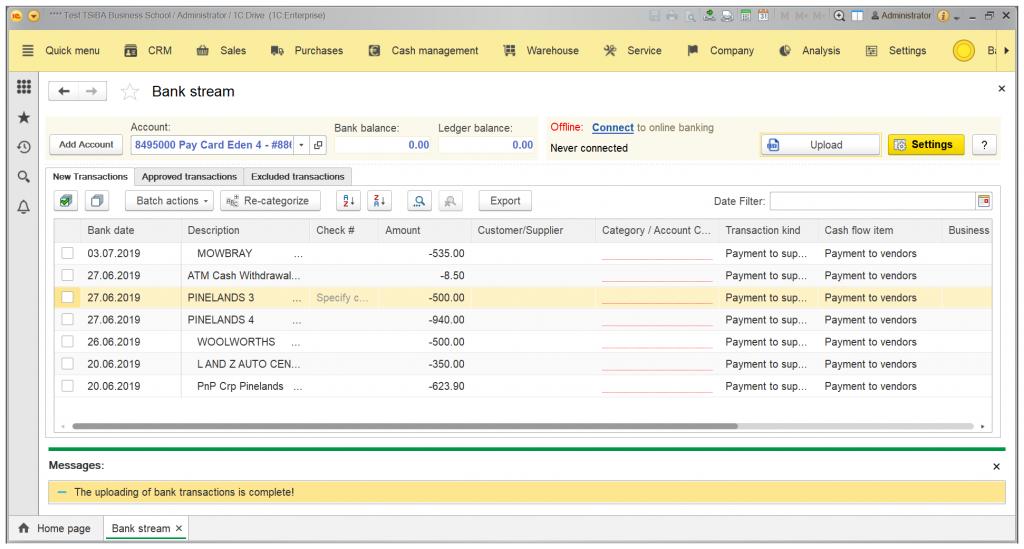
A message will appear below stating that the uploading is complete. The bank stream interface will now have the list of the transactions which you can also match, split, link, and approve.
Rise School Management was developed together with Schools. It's an all-in-one system that covers all the critical processes of local schools. School-specific accounting, automated 043-Form, Budget (actuals vs. planned), a School-Parent Communicator, Batch Invoicing, Incidents, Attendance & much more.
Email Anna at anna.toma@risebiz.co.za for a live demo